DTF transfers have transformed fabric decoration, delivering bold, long-lasting color and a streamlined workflow that designers, brands, and print shops increasingly rely on for scalable merchandise runs. Direct-to-Film printing delivers film-based designs with durable pigment inks and a streamlined workflow. To ensure consistency, focus on color management, film quality, and accurate curing so every print remains vibrant after multiple washes. The process begins with design preparation, then printing onto transfer film, powder adhesion, curing, and final heat-press transfer on garments, with settings tailored to fabric type. When comparing decoration methods, many brands find this approach offers a practical balance of cost, color, and durability compared with other methods.
In other terms, this film-based textile printing method uses a carrier film and a heat-activated adhesive to transfer graphics to apparel. After printing, a bonding powder is cured to create a durable bond, and a heat press securely attaches the design to cotton, blends, or synthetics with strong color and wash resistance. Shop workflows often include file prep, color management, and independent film selection as part of a broader garment decoration strategy. This approach shares similarities with other transfer techniques, yet it stands apart by using a reusable carrier film and a built-in white underbase to help on darker fabrics. Overall, if you’re evaluating options for decorating apparel at scale, consider this film-on-textile method for flexible runs and wide substrate compatibility.
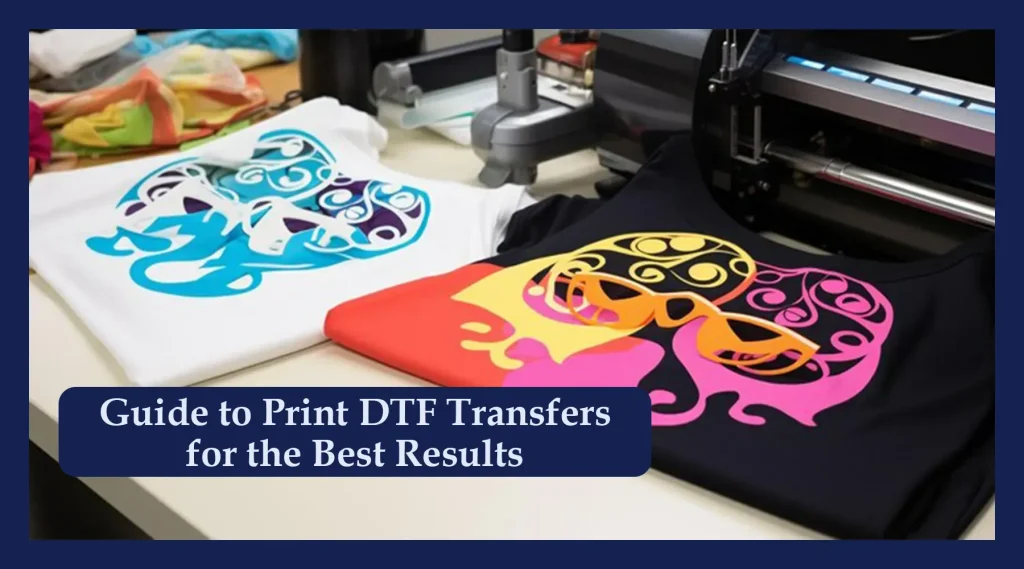
DTF transfers: A comprehensive look at Direct-to-Film printing
DTF transfers are rapidly redefining apparel decoration by enabling vivid, durable prints through Direct-to-Film printing. In this approach, artwork is printed onto a specialized transfer film using pigment inks, then a bonding powder is applied and cured to form a layer that will bond to fabrics when heat-pressed. The film acts as a carrier for the design, while the adhesive powder serves as the bonding agent during transfer.
This method offers strong color depth and compatibility across a wide range of fabrics, including cotton, blends, and certain polyesters. Compared with traditional methods, DTF transfers often deliver sharper edges on complex artwork and work well on dark fabrics due to the built-in white underbase that is incorporated into the film workflow. For designers considering new production methods, DTF provides a flexible, efficient path from design to finished garment.
DTF printer setup essentials: from installation to calibration
A solid DTF printer setup starts with selecting a printer that supports pigment inks designed for DTF, paired with the appropriate DTF film and adhesive powder. Additional essentials include a reliable curing option and a dependable heat press, all backed by careful color management and calibrated profiles. Getting these components aligned is critical for consistent, repeatable results in Direct-to-Film printing.
Beyond hardware, the setup process involves establishing proper workflows: installing ICC profiles, configuring ink channels, and verifying media settings. Regular maintenance—cleaning print heads, monitoring powder application, and keeping the workspace thermally stable—helps maintain color fidelity and bonding strength over many production cycles, ensuring the DTF printer setup remains reliable as volumes grow.
DTF inks and film: selecting materials for vibrant, durable transfers
Choosing the right DTF inks and film is foundational to color vibrancy and long-term durability. Look for pigment-based inks designed for high colorfastness and a film designed to receive the ink evenly while maintaining a strong white underbase when needed. The film’s coating, adhesive compatibility, and powder-adhesion properties all influence the final feel and longevity of the transfer.
When evaluating materials, request samples and run small-scale batches on the fabrics you’ll use most. Test color vibrancy, white underbase strength, and the overall hand feel of the finished transfer. By pairing reliable DTF inks and film with solid color management, you’ll achieve consistent results across different garment types and wash conditions.
The step-by-step DTF transfer process and best practices
The DTF transfer process combines art and engineering: design and file prep, printing on film, powder application, curing, transfer via heat press, and final peel. Each step matters, from ensuring high-resolution artwork to applying the adhesive powder evenly so it bonds securely during heat pressing.
Practical guidelines help minimize issues: maintain appropriate press temperatures (often around 300–320°F or 149–160°C), apply firm pressure, and adhere to recommended dwell times. Decide on warm versus cold peels based on the film and fabric, and allow the garment to cool gradually after transfer. Address fabric type and color with careful preparation to achieve the best edge clarity and wash durability.
DTG vs DTF: choosing the right technology for your project
DTG vs DTF presents a spectrum of trade-offs that matter for project planning. DTF transfers tend to be more cost-effective for small-to-medium runs and offer robust color vibrancy on a broad fabric range, with strong wash-fastness thanks to the adhesive film layer.
DTG prints can deliver an exceptionally soft hand-feel and are well-suited for single-color emphasis or designs with many color layers on suitable fabrics, though unit costs can be higher and substrate dye uptake can affect results. Understanding the needs of your specific project—order size, fabric, color complexity, and wash expectations—helps you decide whether DTG vs DTF is the better fit for your brand or shop.
Frequently Asked Questions
What are DTF transfers and how does the Direct-to-Film printing process work?
DTF transfers are designs printed onto a specialized transfer film using pigment inks. The DTF transfer process typically includes printing the image (with a white underbase when needed), applying a bonding powder to the wet ink, curing the powder, and heat pressing the film onto fabric to bond the design. The result is a vivid, durable image that can be applied to a wide range of fabrics, including dark textiles, with strong wash-fastness.
What should I consider for a proper DTF printer setup (DTF printer setup) and workflow?
A solid DTF printer setup starts with a printer designed for DTF or pigment inks, compatible DTF film, and reliable powder application. Plan for color management, calibrated profiles, and a dedicated curing step, followed by a quality heat-press process. Maintain clean print heads, verify fabric compatibility, and run test prints on your typical fabrics to fine-tune temperatures, times, and pressure.
How do DTF inks and film affect color vibrancy and durability in the DTF transfer process?
DTF inks and film are central to color vibrancy and durability. Pigment inks provide colorfast prints across fabrics, while the specialized film serves as a stable carrier and helps with white underbase on dark fabrics. A high-quality film with good powder adhesion, combined with proper curing, yields durable transfers that resist fading after multiple washes.
DTG vs DTF: which method is best for different projects or fabrics?
DTG vs DTF depends on the project. DTF transfers are often more cost-effective for small to mid-run orders and work well on a wide range of fabrics, including blends and dark textiles, with strong color vibrancy. DTG can offer a soft hand-feel on light fabrics and is ideal for complex multicolor artwork but may require pre-treatment and higher per-unit costs. Consider fabric type, design complexity, and production volume when choosing between them.
What are common issues in the DTF transfer process and how can I troubleshoot them?
Common issues include color fading or dull prints, white underbase failure on dark fabrics, cracking or peeling after wash, and powder shedding. Troubleshooting tips: verify ink quality and color calibration, ensure proper curing of the adhesive powder, follow appropriate heat-press settings, and test washes on sample garments. Regular maintenance of the powder system and consistent environmental conditions also help maintain reliable results.
| Aspect | Key Points |
|---|---|
| What DTF transfers are | Printed on a special transfer film with pigment inks; a bonding powder is applied and cured. The film carries the design and can include a white underbase for dark fabrics, resulting in a vivid, durable image on textiles. |
| Why DTF over traditional methods | DTF offers flexibility, strong color depth, and cost efficiency for small runs. It delivers sharp edges on complex artwork, works well on dark fabrics due to the built‑in white underbase, and provides good wash‑fastness across a broad range of fabrics. It often sits between screen printing and DTG for practical production. |
| Key components of a DTF workflow | DTF printer and pigment inks; DTF film; adhesive powder; curing equipment; heat press; careful color management using ICC profiles and calibrated artwork. |
| Choosing the right film and inks | Select film compatible with your printer and designed for DTF, with reliable powder adhesion and good peel properties. Use pigment‑based inks for durability. Request samples and test on your typical fabrics. |
| The step-by-step DTF transfer process |
|
| Pressing and fabric considerations | DTF transfers work across fabrics. Cotton and cotton blends respond well; polyester blends may require adjustments to temperature and dwell time. Use a white underbase on dark fabrics, pre‑wash fabrics when possible, and place a teflon sheet or parchment between the transfer and heat plate to prevent scorching. |
| Troubleshooting common DTF issues | Fading colors or dull prints: check ink quality, calibration, and powder adhesion. White underbase failure: ensure correct printing order and adequate curing. Cracking or peeling after wash: confirm full bonding and appropriate dwell time/temperature. Powder shedding: ensure proper curing and powder distribution. |
| DTF vs. DTG: making the right choice for your business | DTF transfers are often more cost‑effective for small to medium runs, with strong color vibrancy on a variety of fabrics and forgiving substrate textures. DTG can offer a very soft hand‑feel and is ideal for single‑color designs or designs with many colors, but per‑unit costs can be higher and dye‑uptake on some fabrics can be challenging. |
| Maintenance and workflow optimization | Regularly clean print heads and feeds; calibrate color profiles when inks or films change; clean and inspect the powder application system; maintain a stable environment; document best practices for different films and garments. |
| Design considerations | Keep artwork scalable and avoid overly fine lines; use high‑contrast colors for visibility on dark fabrics; plan for garment color and texture; ensure clean edges; select film thickness and adhesive strength based on the final product. |
| Practical tips for beginners and small shops | Start with a few tested designs and build a color profile library; request samples and print swatches on your fabrics; create a simple QA checklist; maintain a clean workflow; budget for occasional equipment maintenance. |
| Frequently asked questions | How long do DTF transfers last on fabrics? With proper curing and washing, they can last hundreds of washes. Can you do DTF transfers at home? Yes, with a properly equipped workspace and safety measures. Are there environmental considerations? Use high‑quality inks and films and follow disposal guidelines for powders and waste. |
Summary
DTF transfers offer a compelling blend of color vibrancy, durability, and versatility across fabrics. By following the end-to-end workflow—from selecting the right film and inks to mastering the printing, curing, and heat-press steps—you can achieve professional results for personal projects or commercial runs. This approach supports a flexible production line, with strong adhesion, good wash-fastness, and compatibility with cotton, blends, and some polyesters. For designers and brands, understanding DTF transfers helps optimize costs and timelines while maintaining high-quality outcomes. As you test, calibrate, and refine your process, you’ll unlock consistent results that stand up to daily wear and repeated washes, making DTF transfers a practical choice for modern apparel production.