DTF transfers have revolutionized the way designers approach apparel and product customization. By combining bold design ideas with dependable materials, you can achieve high-quality DTF prints that endure wash after wash. From choosing the right DTF transfer paper guide to mastering DTF heat press settings, the process balances precision with creativity. This overview shares practical DTF printing tips to help optimize color, clarity, and durability across fabrics. Whether you work on cotton tees or blends, thoughtful planning and the right materials empower vibrant results.
Viewed through the lens of modern textile decoration, this technique can be described as a heat-applied graphic method that transfers ink or pigment from a film to fabric with strong adhesion. Designers speak in terms of wearable art on textiles, digital fabric decals, or film-based transfer styles, all aimed at long-lasting color and soft hand feel. For fabric choice, workflow, and consistency, think about substrate compatibility, curing temperatures, and pressure profiles as you would with premium printed graphics on apparel. In practice, this approach supports bold imagery, photorealistic detail, and scalable patterns across ranges of garments, from tees to hoodies, while keeping production efficient.
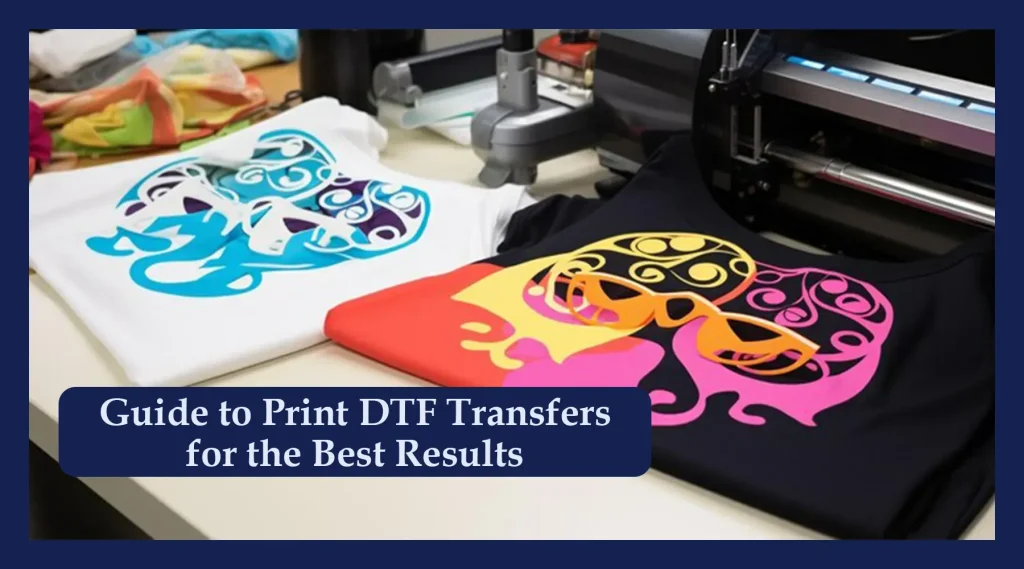
DTF transfers: design ideas that wow customers
DTF transfers open endless possibilities for apparel and product customization. By combining bold typography, vivid color palettes, and thoughtful composition, you can create designs that grab attention on crowded feeds and storefront displays. When leveraging DTF transfers, focusing on scalable design ideas helps ensure legibility and impact across fabrics.
Bold typography with punchy color combos can become the centerpiece of a tee, tote, or hoodie. In DTF transfers design ideas, plan color separations to prevent edge fraying and maintain clean curves after transfer, and consider subtle gradients to add depth without pixelation.
Photorealistic graphics and nuanced textures showcase what DTF transfers can do, especially on high-contrast backgrounds. For best results, ensure images are high-resolution and color-managed (CMYK) to minimize color shifts, and test white ink usage on dark fabrics for strong highlights and crisp edges.
DTF transfer paper guide: selecting the right paper for vibrant results
Choosing the right transfer paper is key to faithful color reproduction and durable wear. The DTF transfer paper guide covers white-backed versus clear-backed options, matte versus glossy finishes, and how each choice influences base tone, opacity, and hand feel.
Adhesive bond quality and backing integrity matter as much as the print itself. In the transfer paper guide, select papers that peel cleanly, bond reliably to fabrics, and are compatible with your printer and inks to achieve high-quality DTF prints that resist washing.
Always pair your paper choice with appropriate coatings and curing guidelines, then run small test prints to verify color fidelity and opacity on your substrate. This aligns with practical DTF printing tips and helps you deliver consistent results across runs.
Color fidelity and CMYK workflow for high-quality DTF prints
Color management is essential for predictable results. A CMYK workflow, soft proofs, and device calibration help you anticipate shifts between screen previews and actual prints, aligning with the goal of high-quality DTF prints.
Calibrate your printer and inks regularly, and use color references to adjust profiles before production. Consistent color checks—along with test swatches—prevent drastic shifts and support reliable DTF transfers design ideas across multiple garments.
Incorporate practical DTF printing tips like controlled white ink opacity on dark substrates and careful layer sequencing to maintain vibrancy. Thoughtful color management ensures the final transfer looks intentional, not accidental.
DTF heat press settings: achieving durable, vibrant transfers
DTF heat press settings are a major determinant of print durability and appearance. Start with a temperature range around 305°F to 320°F (150°C to 160°C) and adjust based on substrate and transfer paper guidelines to maximize color brightness and adhesion.
A typical press time of 12 to 20 seconds, combined with medium to firm pressure, yields solid, even transfers on cotton and blends. Pre-press removes moisture, while post-press steps and peel methods (hot, warm, or cold) should follow the paper manufacturer’s guidance for best results.
Different fabrics respond uniquely to heat and adhesive, so document process notes for each substrate type. This aligns with DTF heat press settings best practices and helps you scale production while maintaining high-quality DTF prints.
Quality assurance and troubleshooting for consistent DTF transfers
Quality assurance starts before pressing: verify artwork, file preparation, and color separations to prevent common misprints. From edge adhesion to substrate compatibility, proactive checks save time and material.
Troubleshooting guides cover white-ink opacity on dark fabrics, color shifts, and wash durability. If edges lift or colors bleed, reassess pressure distribution, ink density, and cure times to maintain a premium finish.
Avoid common mistakes by conducting small test runs, aligning with transfer paper guidelines, and documenting best practices for future batches. This disciplined approach supports reliable DTF transfers with consistent, market-ready results.
Frequently Asked Questions
What are effective DTF transfers design ideas to wow customers?
DTF transfers design ideas include bold typography, photorealistic images, all-over patterns, layered textures, white ink on dark fabrics, metallic accents, and cohesive logos. These ideas showcase DTF’s color fidelity and versatility across fabrics while keeping edges clean and press-ready.
What DTF printing tips help achieve consistently high-quality DTF prints?
DTF printing tips: calibrate your printer regularly, use genuine DTF inks and compatible coatings, run small test swatches, manage color with CMYK soft proofs, optimize layout to reduce waste, and verify white-ink opacity on dark substrates.
What is the best DTF transfer paper guide for color accuracy and durability?
DTF transfer paper guide: choose white polyester or clear-backed papers, decide matte vs glossy finishes, check adhesive strength and backing, ensure paper compatibility with your printer and inks, and run test presses to compare color and durability.
What DTF heat press settings should I start with to ensure crisp transfers?
DTF heat press settings: start at 305–320°F (150–160°C) for 12–20 seconds with medium to firm pressure. Pre-press to remove moisture, follow with a cooldown, and heed the transfer paper’s peel guidance (hot, warm, or cold). Do a test press first.
How can I ensure high-quality DTF prints from concept to finished garment?
To ensure high-quality DTF prints, begin with solid design prep (vector assets or 300 PPI), use reliable transfer paper and inks, apply correct heat press settings, and perform QA checks on edge adhesion, white-ink opacity, color accuracy, and wash durability. Run samples to ensure consistency.
| Topic | Key Points |
|---|---|
| Creative Design Ideas for DTF Transfers | – Bold typography with punchy color combos; ensure text is outlined or shadowed for legibility on dark fabrics. – Photorealistic graphics: use high-res images (at least 300 PPI) and CMYK color management. – All-over patterns: design seamless patterns that align across seams and edges. – Layered textures and abstract art: blend layers with transparency while keeping separations organized. – White ink on dark fabrics: use strategically for highlights and negative space; test opacity. – Metallic/foil-like accents with color overlays: simulate metallics without foil. – Thematic minibooks: logos, badges, emblems for cohesive mini-collections. |
| Design Considerations for DTF Transfers | – File prep and resolution: supply vector art when possible; target at least 300 PPI; avoid upscaling raster assets. – Color management: use CMYK; soft proofs to anticipate shifts; test prints are essential. – Edge handling: plan borders, seams, pockets; include bleed for all-over patterns. – Layering and separations: organize color layers; maintain consistent order. – Substrate compatibility: test on cotton, blends, and poly blends to understand ink behavior. |
| DTF Printing Tips for Consistent Results | – Use high-quality printing tips: calibrate printers, use genuine inks, and compatible coating. – Do test prints: review color accuracy, edge sharpness, white-ink opacity. – Color accuracy checks: compare swatches to references; adjust profiles as needed. – Print layout efficiency: smart tiling/rotation to minimize waste and speed production. – Signal-to-noise balance: preserve fine lines and small text with adequate resolution and ink control. |
| DTF Transfer Paper Guide | – Paper type: white polyester or clear-backed; affects base tone and opacity. – Finish: matte vs glossy influences hand feel and appearance. – Adhesive bond: choose papers with dependable adhesive; ensures clean release. – Backing and carrier: clean removal without tearing. – Compatibility: ensure compatibility with printer, inks, and curing process. |
| Heat Press Settings for DTF Transfers | – Temperature: typically 305°F–320°F (150°C–160°C); adjust by substrate. – Time: 12–20 seconds; adapt to fabric and transfer paper guidelines. – Pressure: medium to firm for solid transfers. – Pre-press / post-press: remove moisture; allow cooldown; peel hot/cold per paper instructions. – Peel method: follow paper guidelines (cold/hot/warm). |
| Quality Assurance and Troubleshooting | – Edge adhesion: check even pressure; rework if edges curl. – White-ink opacity: test opacity on dark fabrics; adjust intensity or layering. – Color shifts: recalibrate color profiles; use soft proofs. – Wash durability: follow paper guidelines; cold washes extend life. – Substrate limitations: some blends may require ink density or press adjustments. |
| Case Studies: Design Ideas That Wow in Action | – Case A: Bold typography with gradient on cotton tees for high daylight visibility and soft hand feel after washing. – Case B: All-over pattern with central emblem on team apparel; scalable from mini tees to hoodies. – Case C: Photo-realistic portraits with subtle texture overlays; careful white ink highlights for glow without glare. |
| Common Mistakes and How to Avoid Them | – Skipping test prints: always verify color, opacity, edge integrity. – Not accounting for substrate differences: adjust heat/adhesion by fabric type. – Poor file preparation: clean vector paths; avoid jagged edges. |
Summary
Conclusion: